Apple's release of iOS 4 brings multitasking, though this can be helpful in some situations, it can get annoying that apps that you have only opened for a moment are left running in the background, taking up valuable resources and speeding up the drain on your battery.
The jailbreak add-on for SBSettings, Processes, aims to solve this problem by giving the user an easier way to close apps running in the background. Processes even goes farther than closing apps by closing up unneeded services and resources.
Open Cydia, go to Search, type in SBSettings. Download and install SBSettings. (Respring device if necessary).
Now slide your finder from left to right on the statusbar (the bar found at the very top section of the screen).
Tap on More (middle-left section of the screen).
Now, tap on Set Toggles.
Turn on Processes.
Press the home button and let your device respring.
Open SBSettings, tap on the Processes icon.
Once you've accessed the Processes section, you can close out apps easily and the press FREE UP MEMORY at the bottom to clear out your free memory in 5 seconds.
If you have downloaded and installed Xcode to your computer and you don't want to pay Apple the $100 to test your application on your device or to submit it to Cydia, you can create a certificate to fool Xcode into allowing you to fully build and test your application.
The following steps will describe how to create this certificate, deploy it into Xcode, and a few steps on how to submit your application to Cydia once you're done creating it.
If you are using a virtual machine to run OS X, a few extra steps are required, these are marked in red asterisks (*). If you are using an Apple computer, you do not need to perform these steps.
6. Make sure that Xcode is not open, if it is close it. Restart Xcode.
7. To start creating projects, click on iPhone Patched, now select a template and start programming your app.
8. The following step must be performed for every new project you create. In Xcode, go to Project, then click on New Build Phase, then on New Run Script Build Phase. Paste the following in the first box.
export CODESIGN_ALLOCATE=/Developer/Platforms/iPhoneOS.platform/Developer/usr/bin/codesign_allocate
if [ "${PLATFORM_NAME}" == "iphoneos" ]; then
/Developer/iphoneentitlements401/gen_entitlements.py "my.company.${PROJECT_NAME}" "${BUILT_PRODUCTS_DIR}/${WRAPPER_NAME}/${PROJECT_NAME}.xcent";
codesign -f -s "iPhone Developer" --entitlements "${BUILT_PRODUCTS_DIR}/${WRAPPER_NAME}/${PROJECT_NAME}.xcent" "${BUILT_PRODUCTS_DIR}/${WRAPPER_NAME}/"
fi
9. Plug in your device through the USB cord.
*10. On the blue VMWare bar at the top of the screen, click on Virtual Machine, then Removable Devices, then on your device name, then on Connect(Disconnect from host).
11. When you want to test your app on your device, click on the gray bar at the top left of the Xcode window and switch to Device. This will switch your testing device from the Simulator to your device.
12. Now click on Build and Run. This will add the app to your device.
13. Restart your device if the app doesn't appear on it's own.
If you get this error There is no SDK with the name or path "iphoneos4.0", see this solution.
If you get this error iPhone Developer no identity found see this solution.
Once you've fully completed developing your application, you can submit to a repository in Cydia.
14. In Xcode, drop down the Products folder.
15. Ctrl+Click the application's name and click on Get Info.
16. Navigate to the Full Path of the application, this is the file you will be submitting.
17. Go to http://modmyi.com/devportal and fill out all the details. They will email you once your package is in Cydia.
Apple has been adamantly refusing to create an iPhone SDK support for Windows-based machines. Luckily, there is a work around to be able to fully run the iOS SDK and Xcode support for most all PC's.
The following steps involve installing a virtual machine on your PC, updating the virtual machine to 10.6.5, then running the machine and downloading and installing the iOS SDK and Xcode on to the virtual machine.
There are other ways to install OS X on your machine but they involve creating a new partition and installing the Operating System directly to your hard drive. Those ways are much harder and have more confusing steps that could potentially damage your computer. This method is easier and safer to use.
The process will take 3-4 hours, but most of the time is consumed by large downloads. There's no software to buy or developer fees to pay. Instructions
4. Now follow these instructions to update to OS X Snow Leopard 10.6.5. This software update is required for the SDK and can not be manually installed through the Apple updater in the OS.
5. Once you've updated, in the virtual machine, go to the the Apple Developer page. Create a new account. Then go to the downloads page.
6. Scroll down to the downloads. Click on Xcode and iOS SDK. The download will likely take around an hour but depending on your connection, it could take longer.
7. Double-click on the .dmg file, then click on Xcode and iPhone SDK.
8. Follow the on-screen directions then wait for the installation to finish.
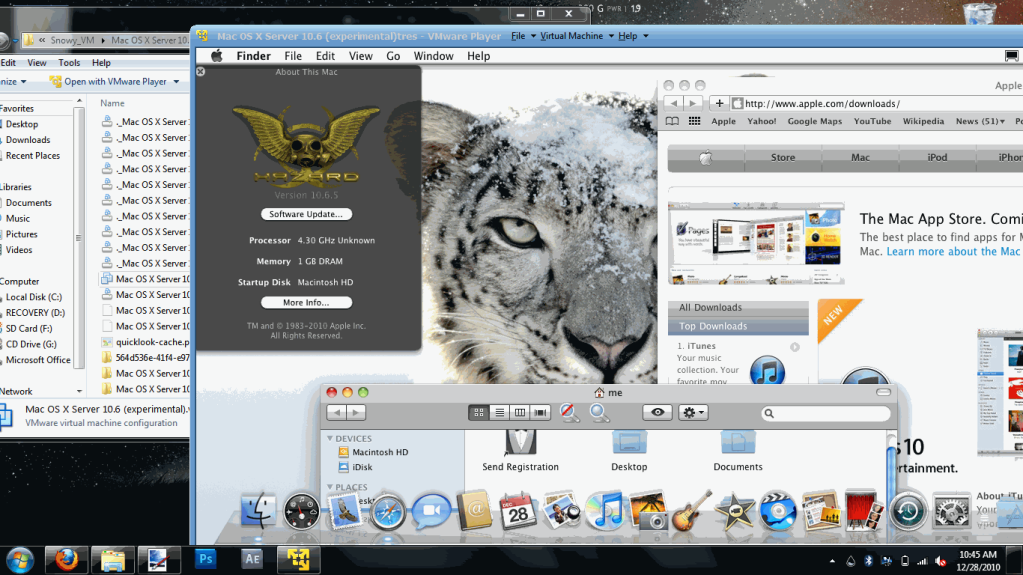
9. Once it's done, you will NOT find the iPhone SDK in your dock. You will need to click on your hard drive (the icon at the top right of your screen). Then Click on Developer, then on Applications.
10. You will now see an icon for Xcode, click it and you can start coding applications.
If the icons don't show up, you may not have enough virtual hard drive space to fit the program. Make sure you have at least 10 GB of free memory in the virtual machine. Restarting your machine may be another way to make the icon appear.
Now you can start coding an app for your personal use. You will be able to test your app on the iPhone simulator in Xcode but you will not be able to add the app to your own device. To add an app that you've created to your device, see the two options below.
Option 1: If you want to submit your app to the App Store, you will need to pay Apple $100 for an official Developers Certificate. This will allow you to sell your app to a very large audience but Apple does place large restrictions on its approval of submissions.
Option 2: If you don't want to pay the $100, you can develop your application for Cydia (similar to the App Store). This option will also allow you to place your app on to your iPhone, not just only in the Xcode simulator.
Cydia is the unofficial App Store for users who have jailbroken and want to sell/share their apps. There are almost no restrictions as to what kind of apps that can be added to Cydia.
running Windows 7 orVista. This process will likely work on
Windows XP but has not been tested.
This will enable you to run all programs for the Mac Operating System on your PC.
Requirements
A laptop or desktop computer that supports virtualization (most newer computers do).
At least 1 GB of RAM (the more, the better). VMware Player (virtualization software, you will need to create a free account). Snow Leopard 10.6.2 (Operating System). Snowy_VM.zip (extra files for installation).
Instructions
Before you start, make sure that you have enabled Virtualization in the BIOS of your computer. This is usually disabled by default by computer manufacturers.
1. Unzip Snowy_VM and navigate to the following file: Snowy_VM\Snowy_VM\Mac OS X Server 10.6 (experimental).vmwarevm\Mac OS X Server 10.6 (experimental).vmx.
Double click this file, it will open VMware Player.
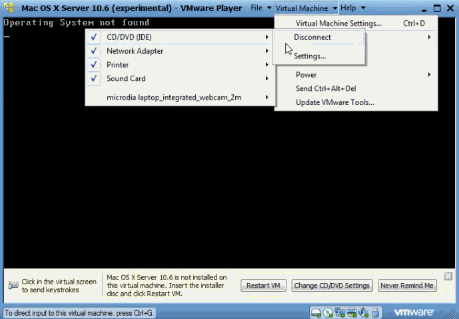
2. You should see a black screen now. On the blue VMware bar, press Virtual Machine > Virtual Machine Settings > CD/DVD > Settings.
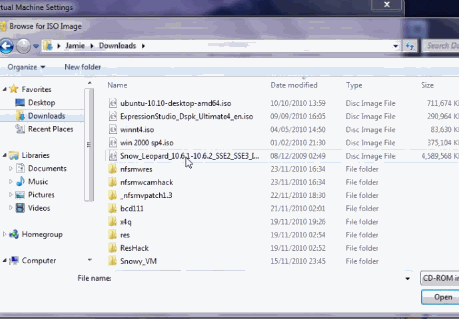
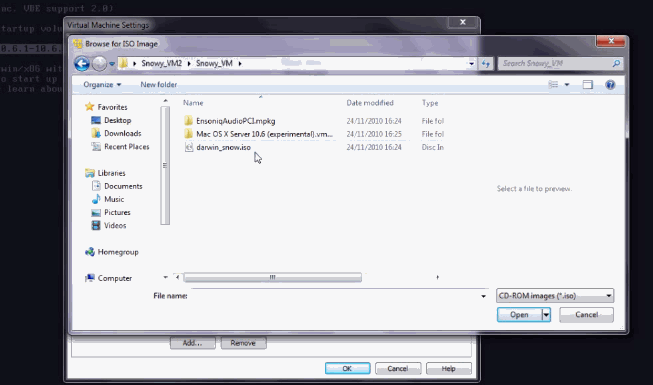
3. On the left, click Use ISO image file, then click Browse.
4. Now select the Snow Leopard 10.6.2 iso file downloaded from the torrent above. Press OK to close the box and return to the black screen.
5. On the blue VMware bar, press Virtual Machine > Send Ctrl + Alt + Del. The machine will now boot up with the iso file. Once the text appears, press F8 on your keyboard.
This is the screen where you can enter in boot flags. Depending on your computer, you may have a different flag from another computer. Many computers have worked without boot flag, so try that first (just press Enter).
A gray screen will appear. In a few moments, a language box will appear. If it does, go down to step 6.
If this screen doesn't appear for 10 minutes you will need to enter a boot flag. Go to the blue VMware bar, press Virtual Machine > Power > Reset. Press F8 at the same screen again. Now enter-x -v busratio=20 cpus=1 arch=i386 -x32. If you get to the language screen, move to step 6.
If you still don't get the language screen, press Virtual Machine > Power > Reset. Press F8 at the same screen again. Now enter -v at the boot screen. This will allow you to figure out exactly where the problem is computer is freezing. You can then Google your error.
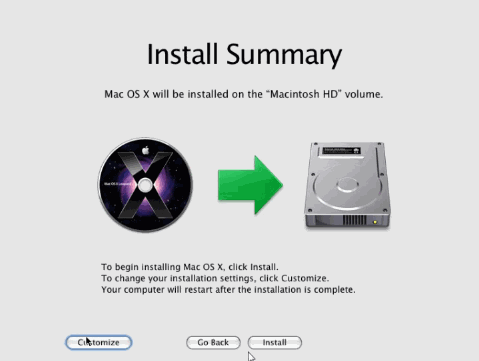
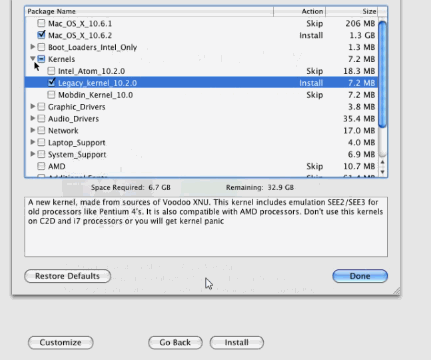
6. Follow the on-screen steps until you reach Install Summary.
7. Here, click on Customize.
8. Select Mac OS_X_10.6.2. Under Kernels, select Legacy_kernel_10.2.0. Under Graphic_Drivers, select GraphicEnabler. Click Done.Click Install. This process should take around 10-15 minutes.
9. Once it's done, the count down from Step 5 will appear, press F8. Then on the blue VMware bar, press Virtual Machine > Virtual Machine Settings > CD/DVD > Settings.
10. Now go to Snowy_VM\Snowy_VM\darwin_snow.iso.
11. On the blue VMware bar, press Virtual Machine > Send Ctrl + Alt + Del.
12. Now wait until OS X 10.6.2 boots up! Just follow the simple setup instructions to create your user account and you'll be on OS X Snow Leopard. If the boot time is extremely long, go to the blue VMware bar, press Virtual Machine > Power > Power off. Then double click the name of your machine in the left column to start it up again.
13. When shutting down the machine, use the X in the top right corner or use the blue VMware bar, press Virtual Machine > Power > Power off.
How to Install Installous on your iPhone/iTouch | eHow.com
How to Install Installous on your iPhone/iTouch
Install Installous on your iPhone/iTouch
User-Submitted Article
This is an app that allows you to install practically any cracked Apple store app on your jailbroken iPhone/iTouch for free. Basically you get to try before you buy! :) Its very simple to install. Here's an easy step by step for you. If you like, please comment, recommend & spread the word! Thanks!
Instructions
1
Turn on your jailbroken device and open up to Cydia.
2
Once loaded go to the Manage section.
3
Once in the Manage section, go into Sources. Click edit and then click add.
4
Type in cydia.hackulo.us Then click add source. *If you get a mess that says unknown date format just click okay* MAKE SURE YOU TYPE IN EXACTLY AS IT SAYS OR IT WONT WORK.
5
Your iPhone/iTouch will respring itself. Now, hit return to Cydia. You will now see Hackulo.us as a source and click done.
 Example Applications